

Optix光线追踪渲染器(三)复杂模型纹理、简单阴影与时域降噪
- 27 3 月, 2023
- by
- pladmin
引言
在上一篇文章中,我们完成了多模型多材质场景的渲染,此时我们已经可以自由地为场景添加很多模型了。但是一个场景如果只有简单的方块形状,而且没有图案,那渲染出来的效果可谓不堪入目,实在对不起optix底层这么大的算力。所以这一节,我们逐步引入大型模型、纹理映射、追加阴影透射等内容。
Part1. 复杂模型导入
导入外部模型需要借助第三方库tiny_obj_loader,调用其LoadObj读取.obj和.mtl文件便可得到所有顶点、索引、法线和材质了。但是,事实上并没有这么简单,因为我们要考虑一件事:一个TriangleMesh对应一个shader Record(即材质)。如果导入的obj是一个模型,但是它身上有多个材质,那么我们将不得不对这个模型进行拆分成多个TriangleMesh,从而映射多套材质。
这是一个相当麻烦的过程,所以我们新建了个Model.h/Model.cpp文件来专门处理模型导入和拆分的事。
Model.h:
#pragma once

#include "gdt/math/AffineSpace.h"
#include <vector>

/*! \namespace osc - Optix Siggraph Course */
namespace osc {
    using namespace gdt;

    /*! a simple indexed triangle mesh that our sample renderer will
        render */
    struct TriangleMesh {
        std::vector<vec3f> vertex;
        std::vector<vec3f> normal;
        std::vector<vec2f> texcoord;
        std::vector<vec3i> index;

        // material data:
        vec3f              diffuse;
    };

    struct Model {
        ~Model()
        {
            for (auto mesh : meshes) delete mesh;
        }

        std::vector<TriangleMesh*> meshes;
        //! bounding box of all vertices in the model
        box3f bounds;
    };

    Model* loadOBJ(const std::string& objFile);
}
首先我们将TriangleMesh的定义移动到Model.h中,并重新定义它的成员参数:vertex(顶点)、normal(法线)、texcoord(uv)、index(三角面索引),这里要注意vertex[k]和normal[k]和texcoord[k]是一一对应的,共同表示模型中索引号为k的点的属性,而index就是存每个三角形中使用顶点的索引号。这里又预存了一个diffuse(漫反射颜色,当然我个人不是很喜欢把材质的内容直接定义在模型结构体内部)
后面定义了一个Model结构体,Model指的是导入的单个模型文件,用meshs管理所有拆分后的模型;bounds是一个包围盒,理论上包围盒需要根据模型的所有顶点计算出模型所覆盖的空间,这样就可以计算出模型的中心点在哪里了。
接下来我们要用loadOBJ来读取.obj文件了,在读取之前,我们还要对.obj文件有一点额外的了解:首先,一个obj文件中可能会有多个shape;顶点、法线、uv、三角面都是分shape存储的。什么是shape呢?比如我们在Blender中创建了一个立方体物体,一个圆柱物体,导出的时候我们把这两个物体导出到同一个.obj中了,那么此时.obj物体就拥有两个shape;而对于每个shape,可以拥有多个材质通道。所以这个.obj中存在多少个材质通道,就需要把.obj的模型切分成多少个TriangleMesh。
我们慢慢来看Model.cpp中的内容:
#include "Model.h"
#define TINYOBJLOADER_IMPLEMENTATION
#include "3rdParty/tiny_obj_loader.h"
//std
#include <set>

namespace std {
  inline bool operator<(const tinyobj::index_t &a,
                        const tinyobj::index_t &b)
  {
    if (a.vertex_index < b.vertex_index) return true;
    if (a.vertex_index > b.vertex_index) return false;

    if (a.normal_index < b.normal_index) return true;
    if (a.normal_index > b.normal_index) return false;

    if (a.texcoord_index < b.texcoord_index) return true;
    if (a.texcoord_index > b.texcoord_index) return false;

    return false;
  }
}
首先导入模型库,后面这一段是用来给index定义大小关系的,然而没有看到哪里用到<这个operator了。。。我们直接无视它。
Model *loadOBJ(const std::string &objFile)
  {
    Model *model = new Model;

    const std::string mtlDir
      = objFile.substr(0,objFile.rfind('/')+1);
    PRINT(mtlDir);

    tinyobj::attrib_t attributes;
    std::vector<tinyobj::shape_t> shapes;
    std::vector<tinyobj::material_t> materials;
    std::string err = "";

    bool readOK
      = tinyobj::LoadObj(&attributes,
                         &shapes,
                         &materials,
                         &err,
                         &err,
						 objFile.c_str(),
                         mtlDir.c_str(),
                         /* triangulate */true);
    if (!readOK) {
      throw std::runtime_error("Could not read OBJ model from "+objFile+":"+mtlDir+" : "+err);
    }

    if (materials.empty())
      throw std::runtime_error("could not parse materials ...");

    std::cout << "Done loading obj file - found " << shapes.size() << " shapes with " << materials.size() << " materials" << std::endl;
    for (int shapeID=0;shapeID<(int)shapes.size();shapeID++) {
      tinyobj::shape_t &shape = shapes[shapeID];

      std::set<int> materialIDs;
      for (auto faceMatID : shape.mesh.material_ids)
        materialIDs.insert(faceMatID);

      std::map<tinyobj::index_t,int> knownVertices;

      for (int materialID : materialIDs) {
        TriangleMesh *mesh = new TriangleMesh;

        for (int faceID=0;faceID<shape.mesh.material_ids.size();faceID++) {
          if (shape.mesh.material_ids[faceID] != materialID) continue;
          tinyobj::index_t idx0 = shape.mesh.indices[3*faceID+0];
          tinyobj::index_t idx1 = shape.mesh.indices[3*faceID+1];
          tinyobj::index_t idx2 = shape.mesh.indices[3*faceID+2];

          vec3i idx(addVertex(mesh, attributes, idx0, knownVertices),
                    addVertex(mesh, attributes, idx1, knownVertices),
                    addVertex(mesh, attributes, idx2, knownVertices));
          mesh->index.push_back(idx);
          mesh->diffuse = (const vec3f&)materials[materialID].diffuse;
          mesh->diffuse = gdt::randomColor(materialID);
        }

        if (mesh->vertex.empty())
          delete mesh;
        else
          model->meshes.push_back(mesh);
      }
    }

    // of course, you should be using tbb::parallel_for for stuff
    // like this:
    for (auto mesh : model->meshes)
      for (auto vtx : mesh->vertex)
        model->bounds.extend(vtx);

    std::cout << "created a total of " << model->meshes.size() << " meshes" << std::endl;
    return model;
  }
loadOBJ函数就是读取、处理模型的函数。首先我们调用tinyObj的LoadObj接口来打开模型,此时会将模型的所有顶点、法线、uv、索引信息存入attributes;将obj中的各个shape存入shapes;将所有材质信息存入materials。
接下来,我们需要按照材质来拆分模型(一个材质对应一个TriangleMesh)。首先一个obj文件有若干个shapes;一个shapes又有若干个材质。所以需要遍历所有shapes;在shapes中,再遍历该shapes内的所有material,对于每一个material,我们创建一个新的TriangleMesh,这里就要开始拆分了,我们遍历该shapes下每一个 材质是当前所遍历材质 的面,我们可以直接得到这个面的索引信息(包括三个顶点的编号、三个顶点的uv号、三个顶点的法线号),然后把它们“塞入”这个新TriangleMesh里。
逻辑其实比较明确,只是怎么“塞入”稍显复杂。这里我们创建了一个addVertex函数,来完成塞入:
int addVertex(TriangleMesh *mesh,
                tinyobj::attrib_t &attributes,
                const tinyobj::index_t &idx,
                std::map<tinyobj::index_t,int> &knownVertices)
  {
    if (knownVertices.find(idx) != knownVertices.end())
      return knownVertices[idx];

    const vec3f *vertex_array   = (const vec3f*)attributes.vertices.data();
    const vec3f *normal_array   = (const vec3f*)attributes.normals.data();
    const vec2f *texcoord_array = (const vec2f*)attributes.texcoords.data();

    int newID = mesh->vertex.size();
    knownVertices[idx] = newID;

    mesh->vertex.push_back(vertex_array[idx.vertex_index]);
    if (idx.normal_index >= 0) {
      while (mesh->normal.size() < mesh->vertex.size())
        mesh->normal.push_back(normal_array[idx.normal_index]);
    }
    if (idx.texcoord_index >= 0) {
      while (mesh->texcoord.size() < mesh->vertex.size())
        mesh->texcoord.push_back(texcoord_array[idx.texcoord_index]);
    }

    // just for sanity's sake:
    if (mesh->texcoord.size() > 0)
      mesh->texcoord.resize(mesh->vertex.size());
    // just for sanity's sake:
    if (mesh->normal.size() > 0)
      mesh->normal.resize(mesh->vertex.size());

    return newID;
  }
addVertex函数需要几个传参:首先需要我们新建的TriangleMesh,然后是obj模型的全部信息attributes,然后是当前遍历到的面的三个索引信息(包括选用几号顶点、几号uv、几号法线),以及一个检查是否有重复索引的map结构knownVertices。
刚进函数时,首先要判断当前这个idx索引信息是否已经有了(即已经出现在了knownVertices里),如果有了,那我们就不需要创建新顶点,直接返回模型的索引编号即可;如果发现这个索引信息还没有,那我们就向TriangleMesh中放入这个新的顶点信息(包括顶点坐标、uv值、法线方向,这些都在attributes里能找到),然后把他记录在knownVertices中;如果之后有三角形的某个点又用到了相同的索引,就直接返回这个索引编号即可。
addVertex会返回新顶点信息的索引号,这样连续三个索引号就可以构成一个TriangleMesh的新三角面了。最后,我们遍历所有顶点来计算bounds的空间范围,方便后面找模型的中心位置。
现在我们将场景中的meshes组改成了Model类,SampleRenderer的成员参数和构造都要跟着改,这里都是细枝末节了所以就不多赘述代码怎么改了。最后修改一下main.cpp实现模型导入:
main.cpp:
extern "C" int main(int ac, char** av)
    {
        try {
            Model* model = loadOBJ("../../models/sponza.obj");
            Camera camera = { /*from*/vec3f(-1293.07f, 154.681f, -0.7304f),
                /* at */model->bounds.center() - vec3f(0,400,0),
                /* up */vec3f(0.f,1.f,0.f) };
            // something approximating the scale of the world, so the
            // camera knows how much to move for any given user interaction:
            const float worldScale = length(model->bounds.span());

            SampleWindow* window = new SampleWindow("Optix 7 Course Example",
                model, camera, worldScale);
            window->run();

        }
        catch (std::runtime_error& e) {
            std::cout << GDT_TERMINAL_RED << "FATAL ERROR: " << e.what()
                << GDT_TERMINAL_DEFAULT << std::endl;
            std::cout << "Did you forget to copy sponza.obj and sponza.mtl into your optix7course/models directory?" << std::endl;
            exit(1);
        }
        return 0;
    }
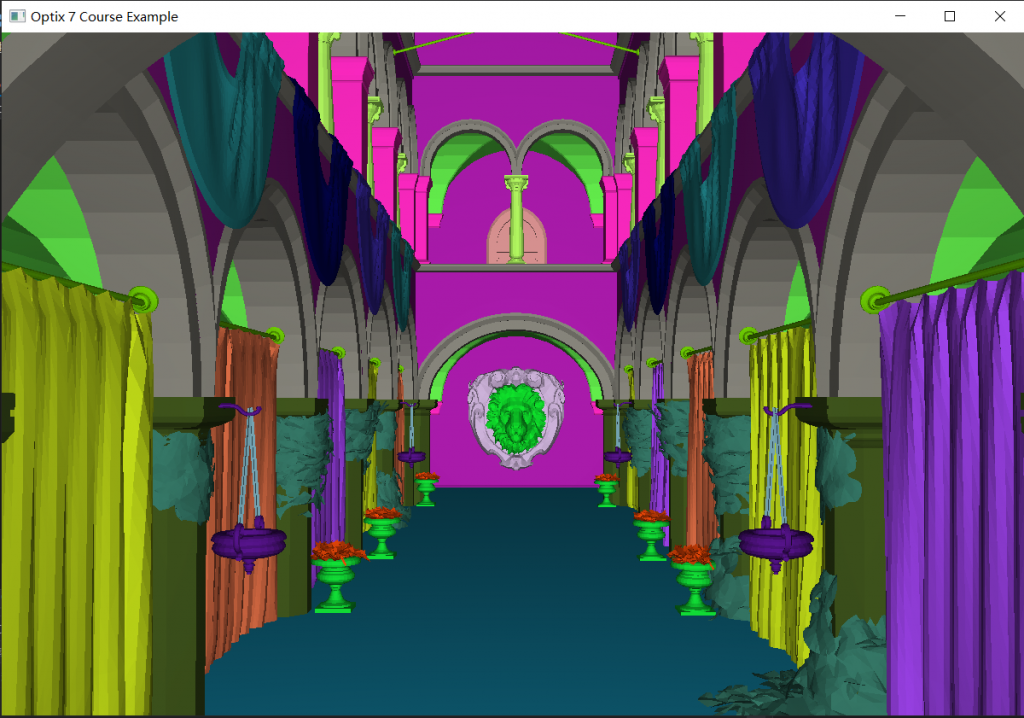
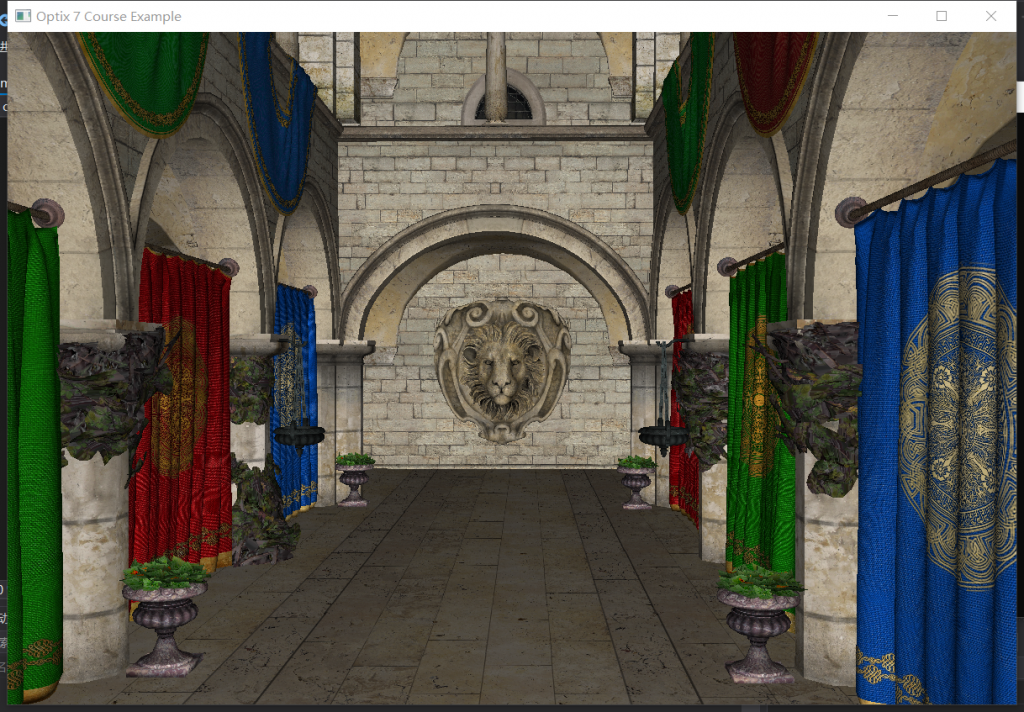
最后在McGuire Computer Graphics Archive (casual-effects.com)网站下,下载一个场景模型放到对应目录,渲染:
Part.2 纹理导入
纹理是ClosetHit Shader用来计算某一点的漫射颜色的,这意味着我们需要在HitGroup Record的data中绑定纹理。由于data是我们自定义的TriangleMeshSBTData结构,因此修改TriangleMeshSBTData:
struct TriangleMeshSBTData {
    vec3f  color;
    vec3f *vertex;
    vec3f *normal;
    vec2f *texcoord;
    vec3i *index;
    bool                hasTexture;
    cudaTextureObject_t texture;
  };
这里我们把法线、uv和纹理全部传入,这样在ClosetHit Shader中可以获取的信息就更丰富了。
接下来,我们向Model和TriangleMesh中也引入纹理的概念:
Model.h:
struct TriangleMesh {
    std::vector<vec3f> vertex;
    std::vector<vec3f> normal;
    std::vector<vec2f> texcoord;
    std::vector<vec3i> index;

    // material data:
    vec3f              diffuse;
    int                diffuseTextureID { -1 };
  };

  struct Texture {
    ~Texture()
    { if (pixel) delete[] pixel; }

    uint32_t *pixel      { nullptr };
    vec2i     resolution { -1 };
  };

  struct Model {
    ~Model()
    {
      for (auto mesh : meshes) delete mesh;
      for (auto texture : textures) delete texture;
    }

    std::vector<TriangleMesh *> meshes;
    std::vector<Texture *>      textures;
    //! bounding box of all vertices in the model
    box3f bounds;
  };
TriangleMesh中加入了一项diffuseTextureID表示当前模型用的是几号贴图,这样在绑定SBT的时候方便向HitGroup Record->data中的texture赋值。同时定义了一个Texture架构体,设置了一个分辨率参数,以及贴图像素指针。对于Model结构体,增加一个textures数组,用来装载该obj所涉及的全部贴图。
接下来编写加载贴图的函数:
int loadTexture(Model *model,
                  std::map<std::string,int> &knownTextures,
                  const std::string &inFileName,
                  const std::string &modelPath)
  {
    if (inFileName == "")
      return -1;

    if (knownTextures.find(inFileName) != knownTextures.end())
      return knownTextures[inFileName];

    std::string fileName = inFileName;
    // first, fix backspaces:
    for (auto &c : fileName)
      if (c == '\\') c = '/';
    fileName = modelPath+"/"+fileName;

    vec2i res;
    int   comp;
    unsigned char* image = stbi_load(fileName.c_str(),
                                     &res.x, &res.y, &comp, STBI_rgb_alpha);
    int textureID = -1;
    if (image) {
      textureID = (int)model->textures.size();
      Texture *texture = new Texture;
      texture->resolution = res;
      texture->pixel      = (uint32_t*)image;

      /* iw - actually, it seems that stbi loads the pictures
         mirrored along the y axis - mirror them here */
      for (int y=0;y<res.y/2;y++) {
        uint32_t *line_y = texture->pixel + y * res.x;
        uint32_t *mirrored_y = texture->pixel + (res.y-1-y) * res.x;
        int mirror_y = res.y-1-y;
        for (int x=0;x<res.x;x++) {
          std::swap(line_y[x],mirrored_y[x]);
        }
      }

      model->textures.push_back(texture);
    } else {
      std::cout << GDT_TERMINAL_RED
                << "Could not load texture from " << fileName << "!"
                << GDT_TERMINAL_DEFAULT << std::endl;
    }

    knownTextures[inFileName] = textureID;
    return textureID;
  }
这段函数就是根据纹理的名称,来打开纹理文件、给其赋予贴图编号、将其绑定在Model->textures上。knownTextures是为了防止重复绑定相同纹理的map记录。
Model* loadOBJ(const std::string& objFile)
    {
        Model* model = new Model;
        const std::string modelDir
            = objFile.substr(0, objFile.rfind('/') + 1);
...

        std::map<std::string, int>      knownTextures;
...
        for (int faceID=0;faceID<shape.mesh.material_ids.size();faceID++) {
          if (shape.mesh.material_ids[faceID] != materialID) continue;
          tinyobj::index_t idx0 = shape.mesh.indices[3*faceID+0];
          tinyobj::index_t idx1 = shape.mesh.indices[3*faceID+1];
          tinyobj::index_t idx2 = shape.mesh.indices[3*faceID+2];

          vec3i idx(addVertex(mesh, attributes, idx0, knownVertices),
                    addVertex(mesh, attributes, idx1, knownVertices),
                    addVertex(mesh, attributes, idx2, knownVertices));
          mesh->index.push_back(idx);
          mesh->diffuse = (const vec3f&)materials[materialID].diffuse;
          mesh->diffuseTextureID = loadTexture(model,
                                               knownTextures,
                                               materials[materialID].diffuse_texname,
                                               modelDir);
        }
回到LoadObj函数,我们就需要提前创建一个knownTextures;同时当我们在创建新的TriangleMesh的时候,调用LoadTextures来加载当前材质所需的贴图并获得该贴图编号,并将编号赋值给TriangleMesh的diffuseTextureID上。
因为这一example我们需要引入法线、uv,而且涉及贴图绑定的内容,因此需要在SampleRenderer.h中额外申请以下变量:
    std::vector<CUDABuffer> normalBuffer;
    std::vector<CUDABuffer> texcoordBuffer;
    std::vector<cudaArray_t>         textureArrays;
    std::vector<cudaTextureObject_t> textureObjects;
在渲染器进行构建的时候,我们需要在管线创建完成之后、建立SBT之前,将纹理全部注册:
void SampleRenderer::createTextures()
  {
    int numTextures = (int)model->textures.size();

    textureArrays.resize(numTextures);
    textureObjects.resize(numTextures);

    for (int textureID=0;textureID<numTextures;textureID++) {
      auto texture = model->textures[textureID];

      cudaResourceDesc res_desc = {};

      cudaChannelFormatDesc channel_desc;
      int32_t width  = texture->resolution.x;
      int32_t height = texture->resolution.y;
      int32_t numComponents = 4;
      int32_t pitch  = width*numComponents*sizeof(uint8_t);
      channel_desc = cudaCreateChannelDesc<uchar4>();

      cudaArray_t   &pixelArray = textureArrays[textureID];
      CUDA_CHECK(MallocArray(&pixelArray,
                             &channel_desc,
                             width,height));

      CUDA_CHECK(Memcpy2DToArray(pixelArray,
                                 /* offset */0,0,
                                 texture->pixel,
                                 pitch,pitch,height,
                                 cudaMemcpyHostToDevice));

      res_desc.resType          = cudaResourceTypeArray;
      res_desc.res.array.array  = pixelArray;

      cudaTextureDesc tex_desc     = {};
      tex_desc.addressMode[0]      = cudaAddressModeWrap;
      tex_desc.addressMode[1]      = cudaAddressModeWrap;
      tex_desc.filterMode          = cudaFilterModeLinear;
      tex_desc.readMode            = cudaReadModeNormalizedFloat;
      tex_desc.normalizedCoords    = 1;
      tex_desc.maxAnisotropy       = 1;
      tex_desc.maxMipmapLevelClamp = 99;
      tex_desc.minMipmapLevelClamp = 0;
      tex_desc.mipmapFilterMode    = cudaFilterModePoint;
      tex_desc.borderColor[0]      = 1.0f;
      tex_desc.sRGB                = 0;

      // Create texture object
      cudaTextureObject_t cuda_tex = 0;
      CUDA_CHECK(CreateTextureObject(&cuda_tex, &res_desc, &tex_desc, nullptr));
      textureObjects[textureID] = cuda_tex;
    }
  }
由于cpu和gpu储存、绑定纹理的形式是完全不同的,因此需要在gpu端对所有用到的纹理进行依次注册。上述代码主要是对所有纹理进行空间计算,并对纹理进行模式定义(滤波、格式等),然后将其绑定到GPU的通道中,最后的textureObjects就是可以被gpu所访问的纹理空间,这里装的纹理可以在Record中被绑定。要问具体每条api代表啥意思,我只能说太复杂了看不懂,略过。
接下来绑定一下SBT:
int numObjects = (int)model->meshes.size();
    std::vector<HitgroupRecord> hitgroupRecords;
    for (int meshID=0;meshID<numObjects;meshID++) {
      auto mesh = model->meshes[meshID];

      HitgroupRecord rec;
      // all meshes use the same code, so all same hit group
      OPTIX_CHECK(optixSbtRecordPackHeader(hitgroupPGs[0],&rec));
      rec.data.color   = mesh->diffuse;
      if (mesh->diffuseTextureID >= 0) {
        rec.data.hasTexture = true;
        rec.data.texture    = textureObjects[mesh->diffuseTextureID];
      } else {
        rec.data.hasTexture = false;
      }
      rec.data.index    = (vec3i*)indexBuffer[meshID].d_pointer();
      rec.data.vertex   = (vec3f*)vertexBuffer[meshID].d_pointer();
      rec.data.normal   = (vec3f*)normalBuffer[meshID].d_pointer();
      rec.data.texcoord = (vec2f*)texcoordBuffer[meshID].d_pointer();
      hitgroupRecords.push_back(rec);
    }
    hitgroupRecordsBuffer.alloc_and_upload(hitgroupRecords);
    sbt.hitgroupRecordBase          = hitgroupRecordsBuffer.d_pointer();
    sbt.hitgroupRecordStrideInBytes = sizeof(HitgroupRecord);
    sbt.hitgroupRecordCount         = (int)hitgroupRecords.size();
SBT部分就是多了一个纹理检测,对每个TriangleMesh检查diffuseTextureID,如果是-1代表没有纹理,就向Record中的hasTexture写入fase;如果≥0代表有纹理,将textureObjects中寄存的纹理赋值给Record中的texture。剩下就是要追加绑定一下normal和texcoord项,因为在shader中采样纹理需要用到各个顶点的texcoord。
最后一步,就是编写以下着色器代码。老样子,我们只需要改写ClosetHit Shader:
extern "C" __global__ void __closesthit__radiance()
  {
    const TriangleMeshSBTData &sbtData
      = *(const TriangleMeshSBTData*)optixGetSbtDataPointer();

    // ------------------------------------------------------------------
    // gather some basic hit information
    // ------------------------------------------------------------------
    const int   primID = optixGetPrimitiveIndex();
    const vec3i index  = sbtData.index[primID];
    const float u = optixGetTriangleBarycentrics().x;
    const float v = optixGetTriangleBarycentrics().y;

    // ------------------------------------------------------------------
    // compute normal, using either shading normal (if avail), or
    // geometry normal (fallback)
    // ------------------------------------------------------------------
    vec3f N;
    if (sbtData.normal) {
      N = (1.f-u-v) * sbtData.normal[index.x]
        +         u * sbtData.normal[index.y]
        +         v * sbtData.normal[index.z];
    } else {
      const vec3f &A     = sbtData.vertex[index.x];
      const vec3f &B     = sbtData.vertex[index.y];
      const vec3f &C     = sbtData.vertex[index.z];
      N                  = normalize(cross(B-A,C-A));
    }
    N = normalize(N);

    // ------------------------------------------------------------------
    // compute diffuse material color, including diffuse texture, if
    // available
    // ------------------------------------------------------------------
    vec3f diffuseColor = sbtData.color;
    if (sbtData.hasTexture && sbtData.texcoord) {
      const vec2f tc
        = (1.f-u-v) * sbtData.texcoord[index.x]
        +         u * sbtData.texcoord[index.y]
        +         v * sbtData.texcoord[index.z];

      vec4f fromTexture = tex2D<float4>(sbtData.texture,tc.x,tc.y);
      diffuseColor *= (vec3f)fromTexture;
    }

    // ------------------------------------------------------------------
    // perform some simple "NdotD" shading
    // ------------------------------------------------------------------
    const vec3f rayDir = optixGetWorldRayDirection();
    const float cosDN  = 0.2f + .8f*fabsf(dot(rayDir,N));
    vec3f &prd = *(vec3f*)getPRD<vec3f>();
    prd = cosDN * diffuseColor;
  }
我们来详细解析一下这段Shader。首先调用了optixGetTriangleBarycentrics()函数,得到了交点在当前三角形的重心坐标。什么是重心坐标呢?假如有一个三角形ABC,取三角形内部一点P,满足AP=u*AB+v*AC,则(u,v)就是P点在该三角形内的1重心坐标。当P点位于B点时,u=1,v=0;当P点位于C点时,u=0,v=1;当P点位于A点时,u=0,v=0。因此我们可以用u描述P离B有多近,用v描述P离C有多近,用1-u-v描述P离A有多近。
之所以要用到重心坐标,是因为我们希望进行Phong式着色,即平滑法线。因为三角形的三个顶点的法线往往指向不同的方向,因此三角形面内的点就需要对三者的法线进行插值。事实上,交点离哪个顶点更近,那么插值哪个顶点的权重就更高,而重心坐标刚好就可以描述这种权重。当然,如果三角形没有法线数据,那么老老实实做叉乘求法线就好。
对于纹理采样,我们需要先求出交点的texcoord,其实求交点texcoord的算法和法线一样,也是以重心坐标为权重 来计算texcoord的插值。得到texcoord的u、v值后,去Record->data中绑定的纹理进行采样,便得到了该交点的纹理颜色。
编译cuda—parse ptx—编译工程—运行项目,喜提runtime error:
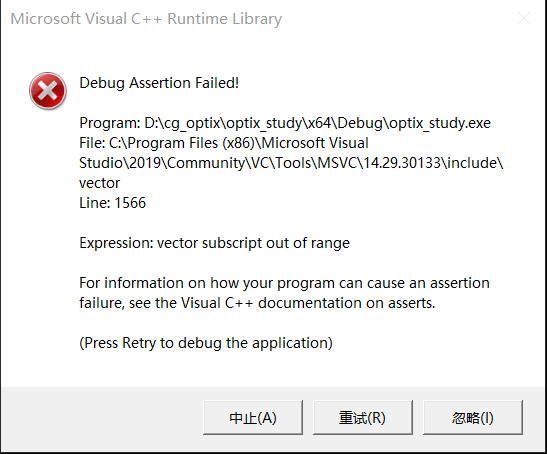
发现是有个CudaBuffer没有resize= =,最后解决了。
Part3. 阴影射线
截止到目前,我们的光追都不是真正的光追,因为所有射线从视角出发,弹射一次就结束了,直接把第一次弹射到的颜色作为最终结果输出,这样的算法自然导致场景中不存在阴影。正规方法肯定是要将后续的弹射全部补充上,不过这一节先不着急,我们再体验一下optix给我们内置的一种快速生成阴影的方法——阴影射线。
阴影射线是一种另类射线,我们假定某处有一个天光,当我们正常光追求交到某个顶点后,让这个顶点向假定的天光发射一根射线,如果未击中任何物体,说明能够抵达天光,那么就着亮色;如果击中了物体,说明天光被这个物体挡住了,那么就着暗色。(事实上,如果大家对重要性采样有了解,就会知道 是否能够直接对光源重要性采样,其实就是靠发射一次阴影射线来检验的。当然这一讲和重要性采样无关)
首先我们修改LaunchParams.h:
enum { RADIANCE_RAY_TYPE=0, SHADOW_RAY_TYPE, RAY_TYPE_COUNT };

struct {
            vec3f origin, du, dv, power;
        } light;
首先我们增加一个枚举项SHADOW_RAY_TYPE;同时增加一个假定的天光,包括它的位置、横纵范围和光强。
然后我们在model.h中增加一个光源的类:
struct QuadLight {
    vec3f origin, du, dv, power;
  };
相应的,我们要修改sampleRenderer的构造,把光源引入场景:
SampleRenderer::SampleRenderer(const Model *model, const QuadLight &light)
    : model(model)
  {
    initOptix();

    launchParams.light.origin = light.origin;
    launchParams.light.du     = light.du;
    launchParams.light.dv     = light.dv;
    launchParams.light.power  = light.power;
由于shadow ray是意义截然不同的射线,因此我们需要为它定义一个不同的miss shader和hit shader。那么在创建管线之前,我们就要预先创建出新的miss shader和hit shader实例:
void SampleRenderer::createMissPrograms()
  {
    // we do a single ray gen program in this example:
    missPGs.resize(RAY_TYPE_COUNT);

    char log[2048];
    size_t sizeof_log = sizeof( log );

    OptixProgramGroupOptions pgOptions = {};
    OptixProgramGroupDesc pgDesc    = {};
    pgDesc.kind                     = OPTIX_PROGRAM_GROUP_KIND_MISS;
    pgDesc.miss.module              = module ;

    // ------------------------------------------------------------------
    // radiance rays
    // ------------------------------------------------------------------
    pgDesc.miss.entryFunctionName = "__miss__radiance";

    OPTIX_CHECK(optixProgramGroupCreate(optixContext,
                                        &pgDesc,
                                        1,
                                        &pgOptions,
                                        log,&sizeof_log,
                                        &missPGs[RADIANCE_RAY_TYPE]
                                        ));
    if (sizeof_log > 1) PRINT(log);

    // ------------------------------------------------------------------
    // shadow rays
    // ------------------------------------------------------------------
    pgDesc.miss.entryFunctionName = "__miss__shadow";

    OPTIX_CHECK(optixProgramGroupCreate(optixContext,
                                        &pgDesc,
                                        1,
                                        &pgOptions,
                                        log,&sizeof_log,
                                        &missPGs[SHADOW_RAY_TYPE]
                                        ));
    if (sizeof_log > 1) PRINT(log);
  }

  /*! does all setup for the hitgroup program(s) we are going to use */
  void SampleRenderer::createHitgroupPrograms()
  {
    // for this simple example, we set up a single hit group
    hitgroupPGs.resize(RAY_TYPE_COUNT);

    char log[2048];
    size_t sizeof_log = sizeof( log );

    OptixProgramGroupOptions pgOptions  = {};
    OptixProgramGroupDesc    pgDesc     = {};
    pgDesc.kind                         = OPTIX_PROGRAM_GROUP_KIND_HITGROUP;
    pgDesc.hitgroup.moduleCH            = module;
    pgDesc.hitgroup.moduleAH            = module;

    // -------------------------------------------------------
    // radiance rays
    // -------------------------------------------------------
    pgDesc.hitgroup.entryFunctionNameCH = "__closesthit__radiance";
    pgDesc.hitgroup.entryFunctionNameAH = "__anyhit__radiance";

    OPTIX_CHECK(optixProgramGroupCreate(optixContext,
                                        &pgDesc,
                                        1,
                                        &pgOptions,
                                        log,&sizeof_log,
                                        &hitgroupPGs[RADIANCE_RAY_TYPE]
                                        ));
    if (sizeof_log > 1) PRINT(log);

    // -------------------------------------------------------
    // shadow rays: technically we don't need this hit group,
    // since we just use the miss shader to check if we were not
    // in shadow
    // -------------------------------------------------------
    pgDesc.hitgroup.entryFunctionNameCH = "__closesthit__shadow";
    pgDesc.hitgroup.entryFunctionNameAH = "__anyhit__shadow";

    OPTIX_CHECK(optixProgramGroupCreate(optixContext,
                                        &pgDesc,
                                        1,
                                        &pgOptions,
                                        log,&sizeof_log,
                                        &hitgroupPGs[SHADOW_RAY_TYPE]
                                        ));
    if (sizeof_log > 1) PRINT(log);
  }

...
for (int meshID = 0; meshID < numObjects; meshID++) {
        for (int rayID = 0; rayID < RAY_TYPE_COUNT; rayID++) {
            auto mesh = model->meshes[meshID];

            HitgroupRecord rec;
            OPTIX_CHECK(optixSbtRecordPackHeader(hitgroupPGs[rayID], &rec));
            rec.data.color = mesh->diffuse;
            if (mesh->diffuseTextureID >= 0) {
                rec.data.hasTexture = true;
                rec.data.texture = textureObjects[mesh->diffuseTextureID];
            }
            else {
                rec.data.hasTexture = false;
            }
            rec.data.index = (vec3i*)indexBuffer[meshID].d_pointer();
            rec.data.vertex = (vec3f*)vertexBuffer[meshID].d_pointer();
            rec.data.normal = (vec3f*)normalBuffer[meshID].d_pointer();
            rec.data.texcoord = (vec2f*)texcoordBuffer[meshID].d_pointer();
            hitgroupRecords.push_back(rec);
        }
    }
其实改动不大,就是把missPG、anyHitPG、closestHitPG都扩充到了两个,然后分别注册、绑定到对应的入口。注意:shadow ray对应的入口函数名分别是__miss__shadow、__closesthit__shadow和__anyhit__shadow,到时候在.cu文件中要定义这三个函数。
现在我们来看一下着色器的具体写法:
extern "C" __global__ void __closesthit__shadow()
  {
    /* not going to be used ... */
  }

  extern "C" __global__ void __closesthit__radiance()
  {
    const TriangleMeshSBTData &sbtData
      = *(const TriangleMeshSBTData*)optixGetSbtDataPointer();
    PRD &prd = *getPRD<PRD>();

    // ------------------------------------------------------------------
    // gather some basic hit information
    // ------------------------------------------------------------------
    const int   primID = optixGetPrimitiveIndex();
    const vec3i index  = sbtData.index[primID];
    const float u = optixGetTriangleBarycentrics().x;
    const float v = optixGetTriangleBarycentrics().y;

    // ------------------------------------------------------------------
    // compute normal, using either shading normal (if avail), or
    // geometry normal (fallback)
    // ------------------------------------------------------------------
    const vec3f &A     = sbtData.vertex[index.x];
    const vec3f &B     = sbtData.vertex[index.y];
    const vec3f &C     = sbtData.vertex[index.z];
    vec3f Ng = cross(B-A,C-A);
    vec3f Ns = (sbtData.normal)
      ? ((1.f-u-v) * sbtData.normal[index.x]
         +       u * sbtData.normal[index.y]
         +       v * sbtData.normal[index.z])
      : Ng;

    // ------------------------------------------------------------------
    // face-forward and normalize normals
    // ------------------------------------------------------------------
    const vec3f rayDir = optixGetWorldRayDirection();

    if (dot(rayDir,Ng) > 0.f) Ng = -Ng;
    Ng = normalize(Ng);

    if (dot(Ng,Ns) < 0.f)
      Ns -= 2.f*dot(Ng,Ns)*Ng;
    Ns = normalize(Ns);

    // ------------------------------------------------------------------
    // compute diffuse material color, including diffuse texture, if
    // available
    // ------------------------------------------------------------------
    vec3f diffuseColor = sbtData.color;
    if (sbtData.hasTexture && sbtData.texcoord) {
      const vec2f tc
        = (1.f-u-v) * sbtData.texcoord[index.x]
        +         u * sbtData.texcoord[index.y]
        +         v * sbtData.texcoord[index.z];

      vec4f fromTexture = tex2D<float4>(sbtData.texture,tc.x,tc.y);
      diffuseColor *= (vec3f)fromTexture;
    }

    // start with some ambient term
    vec3f pixelColor = (0.1f + 0.2f*fabsf(dot(Ns,rayDir)))*diffuseColor;

    // ------------------------------------------------------------------
    // compute shadow
    // ------------------------------------------------------------------
    const vec3f surfPos
      = (1.f-u-v) * sbtData.vertex[index.x]
      +         u * sbtData.vertex[index.y]
      +         v * sbtData.vertex[index.z];

    const int numLightSamples = NUM_LIGHT_SAMPLES;
    for (int lightSampleID=0;lightSampleID<numLightSamples;lightSampleID++) {
      // produce random light sample
      const vec3f lightPos
        = optixLaunchParams.light.origin
        + prd.random() * optixLaunchParams.light.du
        + prd.random() * optixLaunchParams.light.dv;
      vec3f lightDir = lightPos - surfPos;
      float lightDist = gdt::length(lightDir);
      lightDir = normalize(lightDir);

      // trace shadow ray:
      const float NdotL = dot(lightDir,Ns);
      if (NdotL >= 0.f) {
        vec3f lightVisibility = 0.f;
        // the values we store the PRD pointer in:
        uint32_t u0, u1;
        packPointer( &lightVisibility, u0, u1 );
        optixTrace(optixLaunchParams.traversable,
                   surfPos + 1e-3f * Ng,
                   lightDir,
                   1e-3f,      // tmin
                   lightDist * (1.f-1e-3f),  // tmax
                   0.0f,       // rayTime
                   OptixVisibilityMask( 255 ),
                   // For shadow rays: skip any/closest hit shaders and terminate on first
                   // intersection with anything. The miss shader is used to mark if the
                   // light was visible.
                   OPTIX_RAY_FLAG_DISABLE_ANYHIT
                   | OPTIX_RAY_FLAG_TERMINATE_ON_FIRST_HIT
                   | OPTIX_RAY_FLAG_DISABLE_CLOSESTHIT,
                   SHADOW_RAY_TYPE,            // SBT offset
                   RAY_TYPE_COUNT,               // SBT stride
                   SHADOW_RAY_TYPE,            // missSBTIndex
                   u0, u1 );
        pixelColor
          += lightVisibility
          *  optixLaunchParams.light.power
          *  diffuseColor
          *  (NdotL / (lightDist*lightDist*numLightSamples));
      }
    }

    prd.pixelColor = pixelColor;
  }

extern "C" __global__ void __anyhit__radiance()
  { /*! for this simple example, this will remain empty */ }

  extern "C" __global__ void __anyhit__shadow()
  { /*! not going to be used */ }

  //------------------------------------------------------------------------------
  // miss program that gets called for any ray that did not have a
  // valid intersection
  //
  // as with the anyhit/closest hit programs, in this example we only
  // need to have _some_ dummy function to set up a valid SBT
  // ------------------------------------------------------------------------------

  extern "C" __global__ void __miss__radiance()
  {
    PRD &prd = *getPRD<PRD>();
    // set to constant white as background color
    prd.pixelColor = vec3f(1.f);
  }

  extern "C" __global__ void __miss__shadow()
  {
    // we didn't hit anything, so the light is visible
    vec3f &prd = *(vec3f*)getPRD<vec3f>();
    prd = vec3f(1.f);
  }
先看一下正常光线的ClosestHitShader。前半部分和之前写的几乎一样,唯一的区别就是考虑了法线和光线入射方向是否同向,如果同向就翻转一下法线。
后半部分便开始处理阴影射线。首先我们根据重心坐标,计算得到交点位置的世界坐标,接下来我们开始对光源部分进行多次采样,具体采样方案就是向光源的横纵两个方向做一个随机偏移,然后发射阴影射线进行求交,如果求交失败(进入__miss__shadow)表示可以命中光源,则赋值1;如果求交成功(进入__closesthit__shadow)表示被遮挡,则不赋值。最后着色公式就是:是否(材质色*cos)*可见光源*光强*/(到光源的距离)^2/采样数。
这个公式其实不难理解,首先材质色*cos就是普通的lambert模型,不可见光源就着色0,可见光的话,光源贡献与光强成正比,与距离呈平方反比。最后除以一个采样数表示取平均值。
最后我们改写一下main.cpp,把光源送进去:
SampleWindow(const std::string& title,
            const Model* model,
            const Camera& camera,
            const QuadLight& light,
            const float worldScale)
            : GLFCameraWindow(title, camera.from, camera.at, camera.up, worldScale),
            sample(model, light)
        {
            sample.setCamera(camera);
        }
...

const float light_size = 200.f;
      QuadLight light = { /* origin */ vec3f(-1000-light_size,800,-light_size),
                          /* edge 1 */ vec3f(2.f*light_size,0,0),
                          /* edge 2 */ vec3f(0,0,2.f*light_size),
                          /* power */  vec3f(3000000.f) };

      // something approximating the scale of the world, so the
      // camera knows how much to move for any given user interaction:
      const float worldScale = length(model->bounds.span());

      SampleWindow *window = new SampleWindow("Optix 7 Course Example",
                                              model,camera,light,worldScale);
好了,然后我就得到了这样的画面:
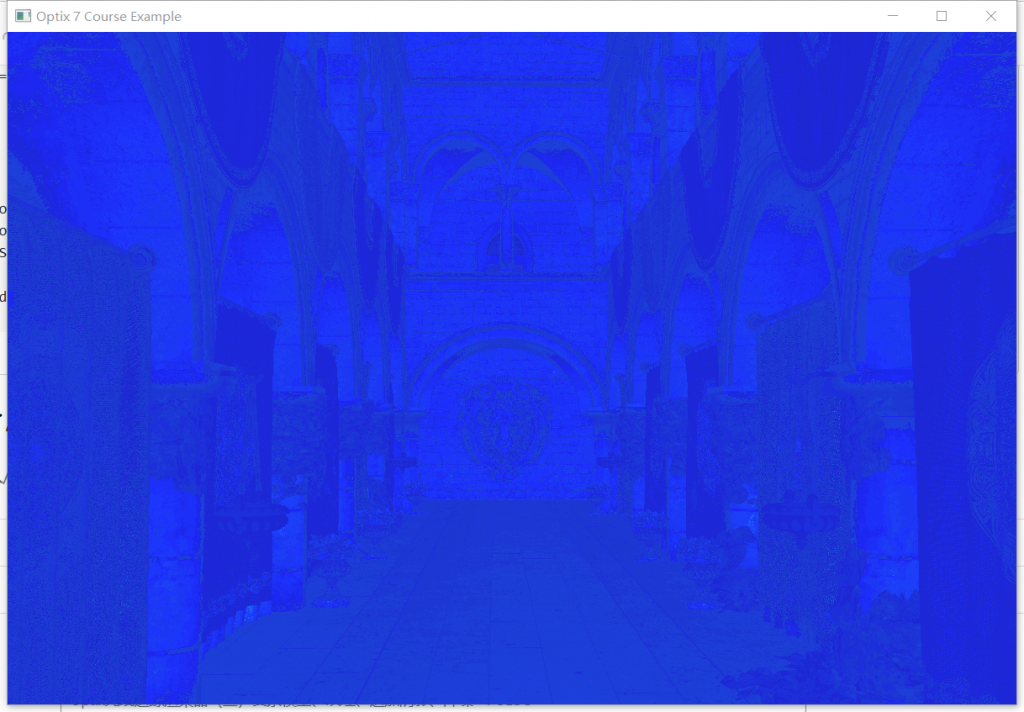
我人裂开。。。这是什么东西啊,蓝色是哪里来的?
经过检查,发现RayGen shader忘了改了。。。不仅没有多次采样,还没有做溢出处理。。。
 struct PRD {
    Random random;
    vec3f  pixelColor;
  };
extern "C" __global__ void __raygen__renderFrame()
  {
      // compute a test pattern based on pixel ID
      const int ix = optixGetLaunchIndex().x;
      const int iy = optixGetLaunchIndex().y;

      const auto& camera = optixLaunchParams.camera;

      // our per-ray data for this example. what we initialize it to
      // won't matter, since this value will be overwritten by either
      // the miss or hit program, anyway
      PRD prd;
      prd.random.init(ix + accumID * optixLaunchParams.frame.size.x,
          iy + accumID * optixLaunchParams.frame.size.y);
      prd.pixelColor = vec3f(0.f);

      // the values we store the PRD pointer in:
      uint32_t u0, u1;
      packPointer(&pixelColorPRD, u0, u1);

      int numPixelSamples = NUM_PIXEL_SAMPLES;

      vec3f pixelColor = 0.f;
      for (int sampleID = 0; sampleID < numPixelSamples; sampleID++) {
          // normalized screen plane position, in [0,1]^2
          const vec2f screen(vec2f(ix + prd.random(), iy + prd.random())
              / vec2f(optixLaunchParams.frame.size));

          // generate ray direction
          vec3f rayDir = normalize(camera.direction
              + (screen.x - 0.5f) * camera.horizontal
              + (screen.y - 0.5f) * camera.vertical);

          optixTrace(optixLaunchParams.traversable,
              camera.position,
              rayDir,
              0.f,    // tmin
              1e20f,  // tmax
              0.0f,   // rayTime
              OptixVisibilityMask(255),
              OPTIX_RAY_FLAG_DISABLE_ANYHIT,//OPTIX_RAY_FLAG_NONE,
              RADIANCE_RAY_TYPE,            // SBT offset
              RAY_TYPE_COUNT,               // SBT stride
              RADIANCE_RAY_TYPE,            // missSBTIndex
              u0, u1);
          pixelColor += prd.pixelColor;
      }

      const int r = int(255.99f * min(pixelColor.x / numPixelSamples, 1.f));
      const int g = int(255.99f * min(pixelColor.y / numPixelSamples, 1.f));
      const int b = int(255.99f * min(pixelColor.z / numPixelSamples, 1.f));

      // convert to 32-bit rgba value (we explicitly set alpha to 0xff
      // to make stb_image_write happy ...
      const uint32_t rgba = 0xff000000
          | (r << 0) | (g << 8) | (b << 16);

      // and write to frame buffer ...
      const uint32_t fbIndex = ix + iy * optixLaunchParams.frame.size.x;
      optixLaunchParams.frame.colorBuffer[fbIndex] = rgba;
  }
这里就是说,我们场景需要多次采样,最后取一个平均值。因为光强非常高,因此算出来的最终像素颜色很有可能会溢出,所以需要做一个钳制。
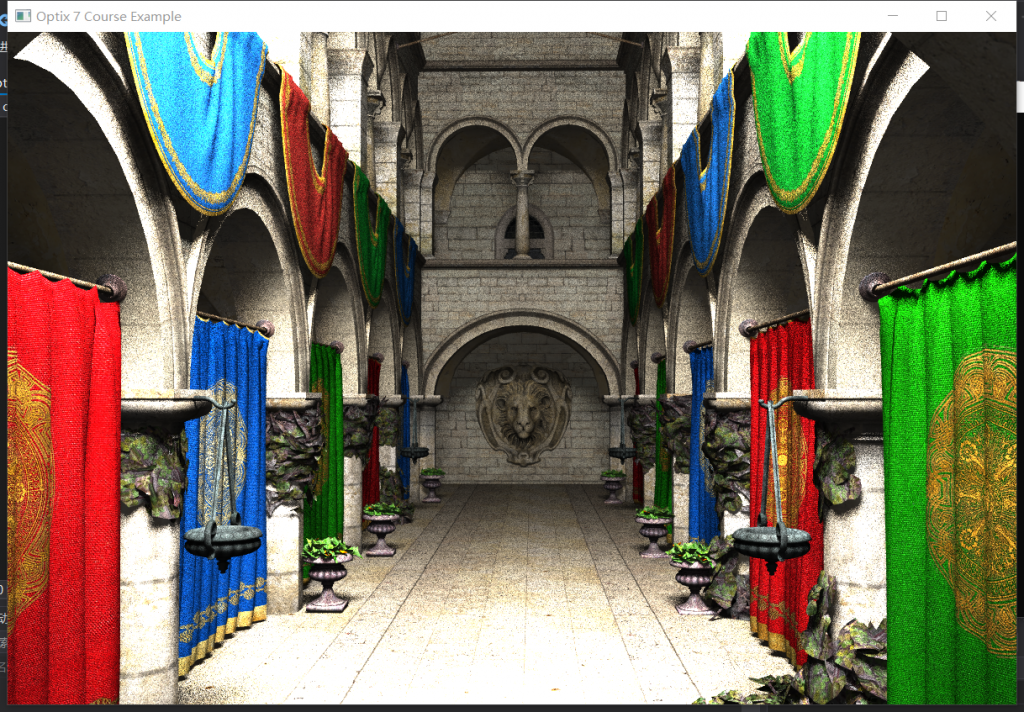
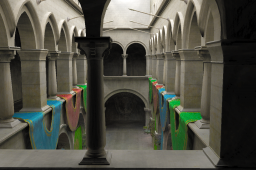
感觉还凑合吧。反正光线一共只弹射两次,相当于牺牲画面追求效率了。
Part4. 时域降噪
在之前我们写离线光追的时候,每次渲染,都会跑N次采样,直到每个像素都完成N次采样后,再统一把结果写入最终图像,交给客户端。但如今我们希望实现实时光追,所以渲染器不能等每个像素都采够N次后才提交结果,这样屏幕的刷新频率太低了。所以我们需要每次都只采样N/k次,然后立刻更新图像提交结果,表示这一帧的任务完成。提交完以后开始新的渲染,再与前面的帧的结果进行混合,这样持续刷新k帧,就能得到最终的光追结果了。
举个例子,假如一个场景的采样数是20000次,基本上交给optix也需要10几秒才能采完,这也意味着用户每次更新视角,optix都需要花10几秒才能更新一次画面,这样有违背“实时”的理念。因此我们每次只让optix采样100次就刷新结果,然后让客户端取到当前的画面,此时再让optix进行新一次100采样数的渲染,每次渲染结果都与之前的结果做平均,这样用户就可以看到能实时刷新画面、噪点由多变少的实时场景了,这就是时域上的降噪。并且可以计算得到,只需200帧,就可以看到光追完成的最终结果了。
当然这也意味着,当用户切换视角时,前几帧会有铺天盖地的噪点。为了让用户有一个好的观感,所以还需要空域降噪的功能,空域降噪可以让用户在切换视角后前几帧不用看到很扎眼的噪声图,而是场景的一个模糊的外观。当然这一节先不讲空域降噪,放在后面说。
int numPixelSamples = 1;
    struct {
      int       frameID = 0;
      float4   *colorBuffer;

      /*! the size of the frame buffer to render */
      vec2i     size;
    } frame;
这里使用numPixelSamples控制每一帧的采样数;用frameID控制当前是渲染的第几帧。
然后我们修改一下SampleRenderer.cpp的render函数:
  void SampleRenderer::render()
  {
      launchParamsBuffer.upload(&launchParams, 1);
      launchParams.frame.frameID++;
每次调用渲染接口时,就给frameID加1,表示下一帧的渲染。
接下来我们编写一下着色器,只需要修改一下RayGen Shader:
extern "C" __global__ void __raygen__renderFrame()
  {
      // compute a test pattern based on pixel ID
      const int ix = optixGetLaunchIndex().x;
      const int iy = optixGetLaunchIndex().y;
      const auto& camera = optixLaunchParams.camera;

      PRD prd;
      prd.random.init(ix + optixLaunchParams.frame.size.x * iy,
          optixLaunchParams.frame.frameID);
      prd.pixelColor = vec3f(0.f);

      // the values we store the PRD pointer in:
      uint32_t u0, u1;
      packPointer(&prd, u0, u1);

      int numPixelSamples = optixLaunchParams.numPixelSamples;

      vec3f pixelColor = 0.f;
      for (int sampleID = 0; sampleID < numPixelSamples; sampleID++) {
          // normalized screen plane position, in [0,1]^2
          vec2f screen(vec2f(ix + prd.random(), iy + prd.random())
              / vec2f(optixLaunchParams.frame.size));

          // generate ray direction
          vec3f rayDir = normalize(camera.direction
              + (screen.x - 0.5f) * camera.horizontal
              + (screen.y - 0.5f) * camera.vertical);

          optixTrace(optixLaunchParams.traversable,
              camera.position,
              rayDir,
              0.f,    // tmin
              1e20f,  // tmax
              0.0f,   // rayTime
              OptixVisibilityMask(255),
              OPTIX_RAY_FLAG_DISABLE_ANYHIT,//OPTIX_RAY_FLAG_NONE,
              RADIANCE_RAY_TYPE,            // SBT offset
              RAY_TYPE_COUNT,               // SBT stride
              RADIANCE_RAY_TYPE,            // missSBTIndex
              u0, u1);
          pixelColor += prd.pixelColor;
      }

      vec4f rgba(pixelColor / numPixelSamples, 1.f);

      // and write/accumulate to frame buffer ...
      const uint32_t fbIndex = ix + iy * optixLaunchParams.frame.size.x;
      if (optixLaunchParams.frame.frameID > 0) {
          rgba
              += float(optixLaunchParams.frame.frameID)
              * vec4f(optixLaunchParams.frame.colorBuffer[fbIndex]);
          rgba /= (optixLaunchParams.frame.frameID + 1.f);
      }
      optixLaunchParams.frame.colorBuffer[fbIndex] = (float4)rgba;
  }
前半部分基本没有变化,后面就是根据numPixelSamples决定采样数,然后根据帧号,去和之前的帧进行混合,从而实现随着时间推进噪点减少的效果。
当我们切换视角的时候,前面的帧就需要丢弃了,此时从第0帧开始渲染。所以我们在SampleRenderer.cpp的setCamera()函数中添加一句launchParams.frame.frameID = 0;最后在draw函数中,将glfwindow的画面纹理格式改成GLenum texelType = GL_FLOAT,不然会花屏。
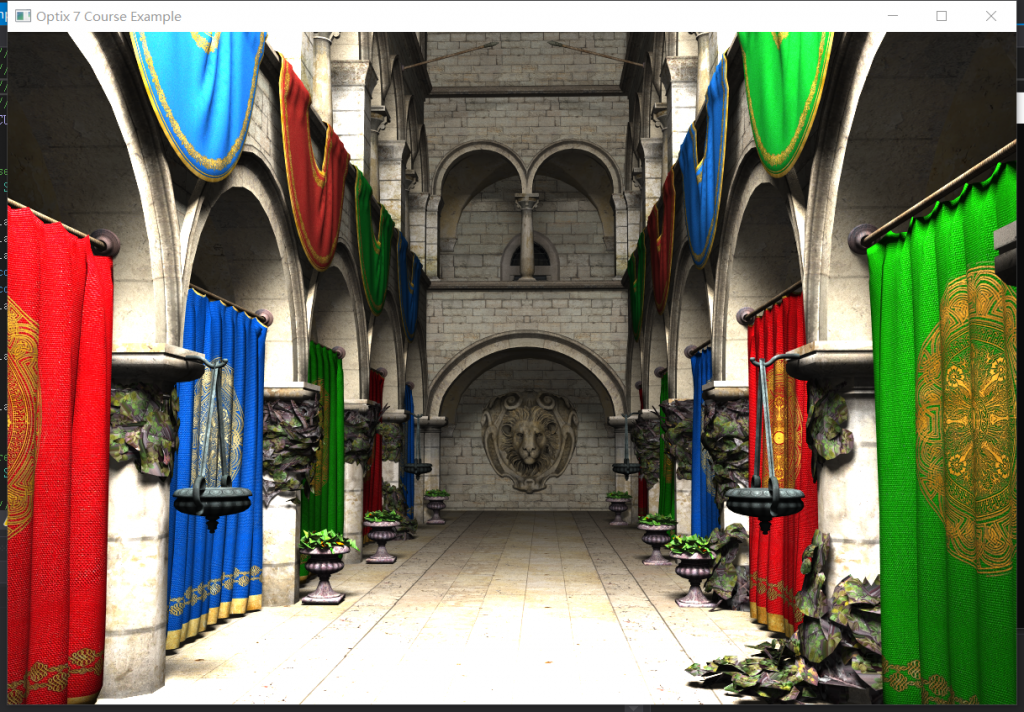
到这里,我们前10个example就彻底完成了。当然后面还有两个example是讲降噪的,不过我个人感觉目前不着急复现这个。现在最大的问题是:我们的场景到目前依旧只有2次弹射,尤其第二次还是定向弹射,这与真正的光追差距还很大。因此下节开始,我们正式脱离教程,开始实现真正的光线追踪。
You may also Like
Optix光线追踪渲染器(五)直接光采样数学推演与实现
Optix光线追踪渲染器(四)路径追踪算法与材质实例
