

Opengl实时渲染器(二)光照计算与模型导入
- 05 4 月, 2023
- by
- pladmin
引言
没啥可说的,这节直接来复现光照。
Part1. Lambert模型
我们假设场景中某处有一个无限小点光源,它的位置是L;那么我们物体上每一点O的着色结果就是:
$$L_{out} = L_{light} * \rho_d *dot(n,l)$$
其中L_light是光照强度,rho_d是漫反射分量(此时就理解成纹理的颜色),n是表面法线,l是片元指向光源的单位向量。
所以我们可以分析出,首先我们需要向shader中传入光源的强度以及光源的位置,然后在片元着色器中要获得当前片元的法线和位置,这样就可以得到最终的光线出射结果了。
添加光源信息:
while (!glfwWindowShouldClose(window))     //开始渲染循环
    {
        processInput(window);                  //自定义的检测键盘输入函数
        glClearColor(0.0f, 0.0f, 0.0f, 1.0f);
        glClear(GL_COLOR_BUFFER_BIT | GL_DEPTH_BUFFER_BIT);

        glUseProgram(shaderProgram);

        shader.setVec3("lightPos", glm::vec3(0, 3, 2));
        shader.setVec3("lightColor", glm::vec3(1, 1, 1));
将光源位置置于前上方,然后光强设置为白色。接下来改一下顶点着色器和片元着色器:
///////////////////////顶点着色器///////////////////////
#version 330 core

layout (location = 0) in vec3 aPos;
layout (location = 1) in vec2 aUV;
layout (location = 2) in vec3 aNormal;

out vec3 normal;
out vec2 texcoord;
out vec3 FragPos;

uniform mat4 model;
uniform mat4 view;
uniform mat4 projection;

void main()
{
   gl_Position = projection * view * model * vec4(aPos, 1.0);
   FragPos = vec3(model * vec4(aPos, 1.0));
   normal = aNormal;
   texcoord = aUV;
}
///////////////////////片元着色器///////////////////////
#version 330 core

in vec3 normal;
in vec2 texcoord;
in vec3 FragPos;
out vec4 FragColor;
uniform sampler2D ourTexture;
uniform vec3 lightPos;
uniform vec3 lightColor;

void main()
{
   vec3 ambient = lightColor * 0.15;
   vec3 norm = normalize(normal);
   vec3 lightDir = normalize(lightPos - FragPos);
   vec3 diffuse = vec3(texture(ourTexture, texcoord));
   float cosine = max(dot(norm, lightDir), 0.0);
   FragColor = vec4(ambient + lightColor * diffuse * cosine, 1.0);
}
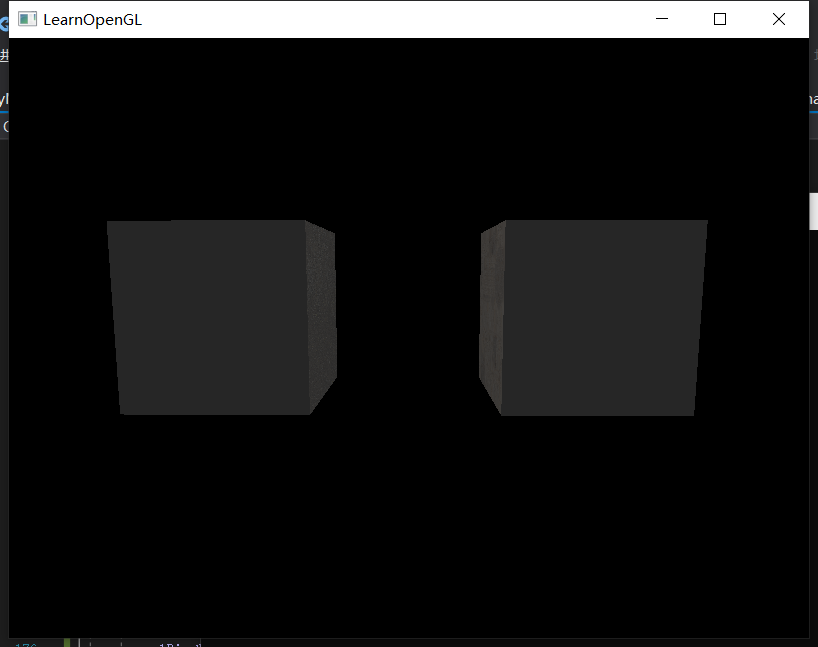
顶点着色器需要把顶点所处的世界坐标传给片元,这样管线插值后片元可以得到自己所在的世界坐标;片元着色器就分别计算纹理颜色、法线和光源方向点乘得到的cosine项、光源强度,将三者乘在一起便是lambert模型了。但是对于接收不到光照的地方是全黑,显然也不是很合适,因此可以再额外加一个恒定值ambient(环境光),让全黑的地方也能有一点亮度。
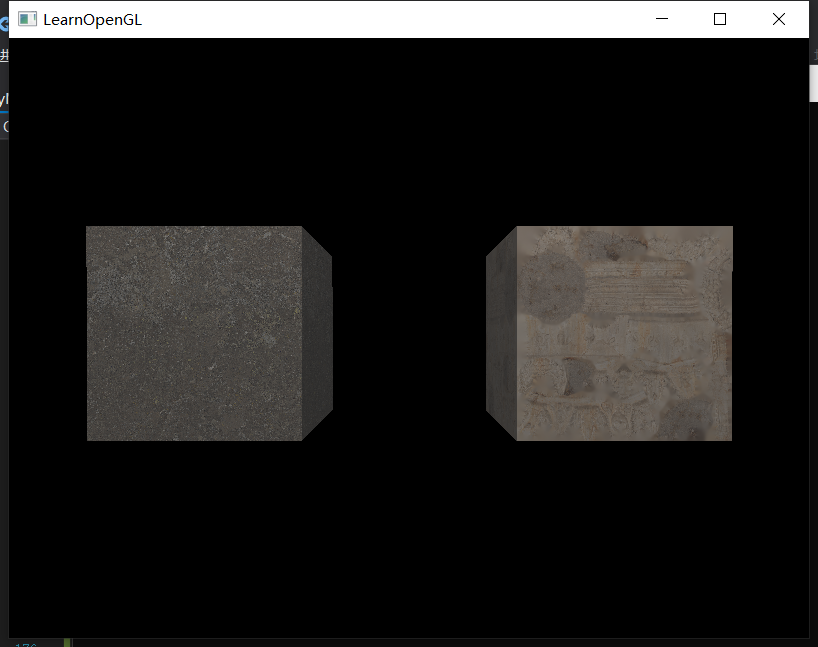
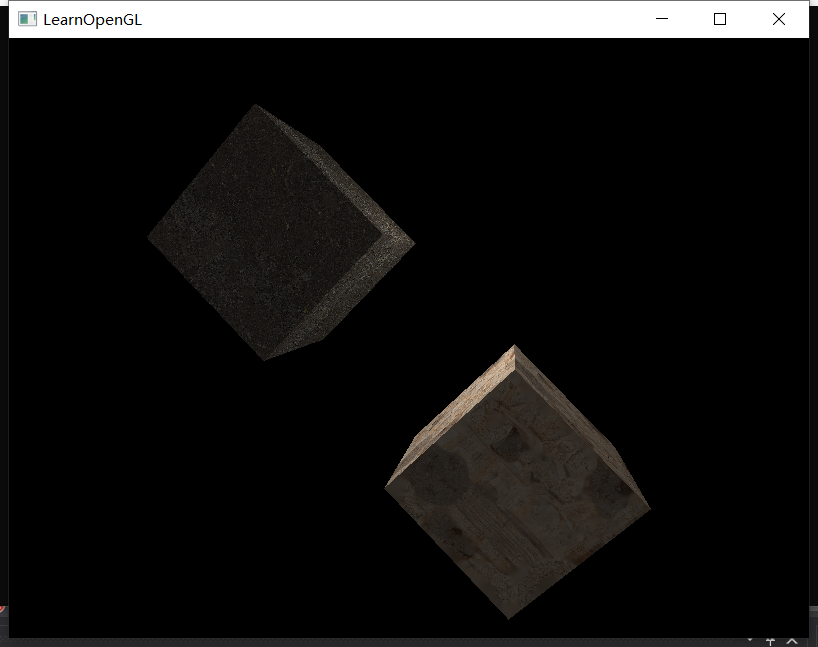
这样看起来没什么问题。但是如果我们给模型旋转90°,就会发现猫腻:
为什么旋转90度以后,表面就黑了呢?这是因为我们旋转顶点的时候,只改变了它的世界坐标,却没有改变它的法线方向。原本面朝上的那个四边面,经过旋转90度后面朝屏幕,然而此时的法线仍然朝上,所以猫腻就出现了。解决办法就是在变换顶点的时候,将法线一并变换。
然而从数学推理结果来看,顶点乘以一个模型-世界矩阵就可以从模型空间转移到世界空间,但是法线却不是乘一个模型-世界矩阵就可以变换成功的,它要乘的是模型-世界矩阵的逆转置矩阵,所以我们这样改:
///////////////////////顶点着色器///////////////////////
#version 330 core

layout (location = 0) in vec3 aPos;
layout (location = 1) in vec2 aUV;
layout (location = 2) in vec3 aNormal;

out vec3 normal;
out vec2 texcoord;
out vec3 FragPos;

uniform mat4 model;
uniform mat4 view;
uniform mat4 projection;

void main()
{
   gl_Position = projection * view * model * vec4(aPos, 1.0);
   FragPos = vec3(model * vec4(aPos, 1.0));
   normal = mat3(transpose(inverse(model))) * aNormal;;
   texcoord = aUV;
}
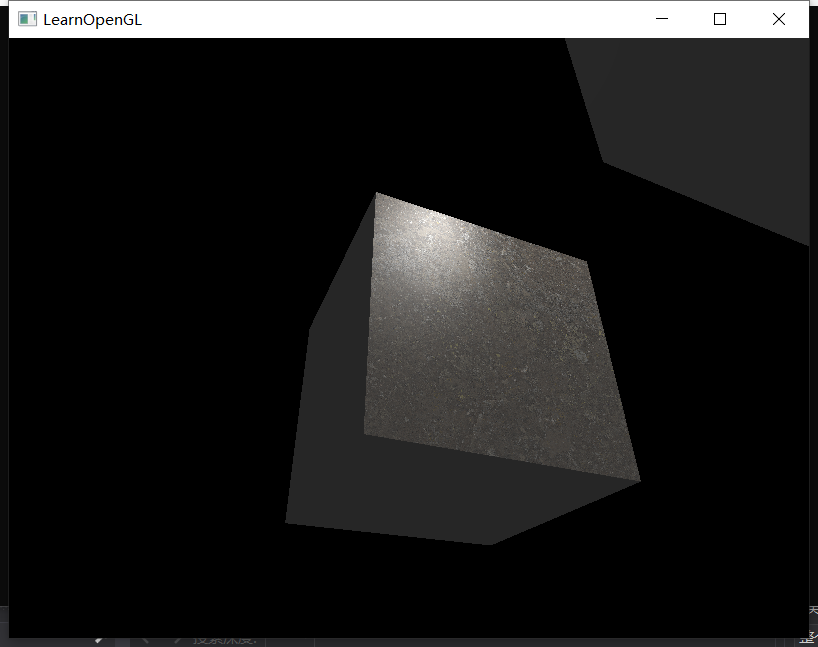
此时无论如何旋转立方体,光照结果都是正确的了:
Part2. Phong模型
Lambert模型只有漫反射分量,而Phong模型正式引入高光分量。我们假设光线的镜面反射向量是R,片元指向相机的向量是V:
$$L_{out} = L_{light} * (\rho_d + \rho_s*\frac{dot(R,V)^n}{dot(n,l)}) *dot(n,l)$$
$$L_{out} = L_{light} * (\rho_d * dot(n,l) + \rho_s*dot(R,V)^n)$$
这个式子比Lambert模型多了一个R和一个V,其中R可以根据入射光向量l和法线n计算得到,而V的计算需要相机的位置参数,这个参数就必须由客户端从外部传进shader了。
while (!glfwWindowShouldClose(window))     //开始渲染循环
    {
        processInput(window);                  //自定义的检测键盘输入函数
...

        shader.setVec3("lightPos", glm::vec3(0, 3, 2));
        shader.setVec3("lightColor", glm::vec3(1, 1, 1));
        shader.setVec3("cameraPos", camera->cameraPos);
...
在shader中,我们直接抄phong模型的公式:
#version 330 core

in vec3 normal;
in vec2 texcoord;
in vec3 FragPos;
out vec4 FragColor;
uniform sampler2D ourTexture;
uniform vec3 lightPos;
uniform vec3 lightColor;
uniform vec3 cameraPos;

void main()
{
   vec3 ambient = lightColor * 0.15;
   vec3 norm = normalize(normal);
   vec3 lightDir = normalize(lightPos - FragPos);
   vec3 rho_d = vec3(texture(ourTexture, texcoord));
   float cosine = max(dot(norm, lightDir), 0.0);

   float rho_s = 0.5;
   vec3 viewDir = normalize(cameraPos - FragPos);
   vec3 reflectDir = reflect(-lightDir, norm);
   float cosine2 = pow(max(dot(viewDir, reflectDir), 0.0), 16);
   FragColor = vec4(ambient + lightColor * (rho_d * cosine + rho_s * cosine2), 1.0);
}
这样就能看到模型表面有明显的高光了。
Part3. 材质参数
我们重新审视一下phong模型,就会发现有四个参数是可以自己定义的:rho_d(漫反射颜色)、rho_s(高光分量强度)、n(高光亮点凝聚度)、ambient(环境光添补)。现在我们是将rho_s、n、ambient的值在shader里写死成固定值了,但事实上不同材质这些参数的值都是不一样的。因此,我们必须将他们做成可调整的材质参数。
其实方法很简单,自定义一个材质结构体,把各个物体的材质信息写入,然后将它以uniform的格式传入片元着色器即可。
#version 330 core

in vec3 normal;
in vec2 texcoord;
in vec3 FragPos;
out vec4 FragColor;
uniform vec3 lightPos;
uniform vec3 lightColor;
uniform vec3 cameraPos;

struct Material {
    vec3 ambient;
    sampler2D rho_d_tex;
    vec3 rho_s;
    float shininess_n;
};

uniform Material material;

void main()
{
   vec3 norm = normalize(normal);
   vec3 lightDir = normalize(lightPos - FragPos);
   vec3 rho_d = vec3(texture(material.rho_d_tex, texcoord));
   float cosine = max(dot(norm, lightDir), 0.0);

   vec3 viewDir = normalize(cameraPos - FragPos);
   vec3 reflectDir = reflect(-lightDir, norm);
   float cosine2 = pow(max(dot(viewDir, reflectDir), 0.0), material.shininess_n);
   FragColor = vec4(material.ambient + lightColor * (rho_d * cosine + material.rho_s * cosine2), 1.0);
}
材质信息传递部分:
shader.setVec3("material.ambient", glm::vec3(0.0f, 0.0f, 0.0f));
        shader.setInt("material.rho_d_tex", 0);
        glActiveTexture(GL_TEXTURE0);
        glBindTexture(GL_TEXTURE_2D, TEX[0]);
        shader.setVec3("material.rho_s", glm::vec3(0.3f, 0.3f, 0.3f));
        shader.setFloat("material.shininess_n", 64.0f);

        glBindTexture(GL_TEXTURE_2D, TEX[0]);
        glBindVertexArray(VAO[0]);
        glDrawElements(GL_TRIANGLES, 36, GL_UNSIGNED_INT, 0);

        glBindTexture(GL_TEXTURE_2D, TEX[1]);
        glBindVertexArray(VAO[1]);
        glDrawElements(GL_TRIANGLES, 36, GL_UNSIGNED_INT, 0);
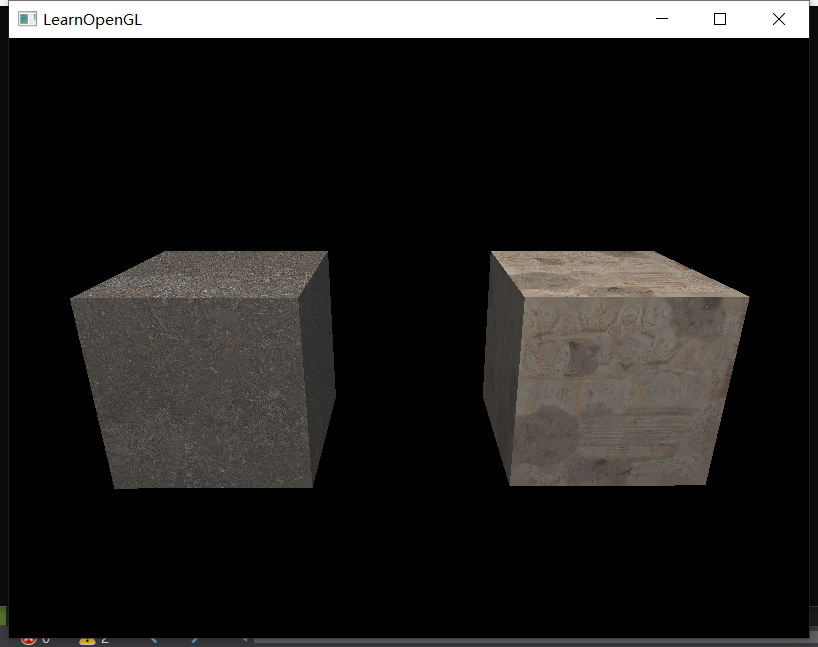
这样就完成了材质的封装和外部导入。
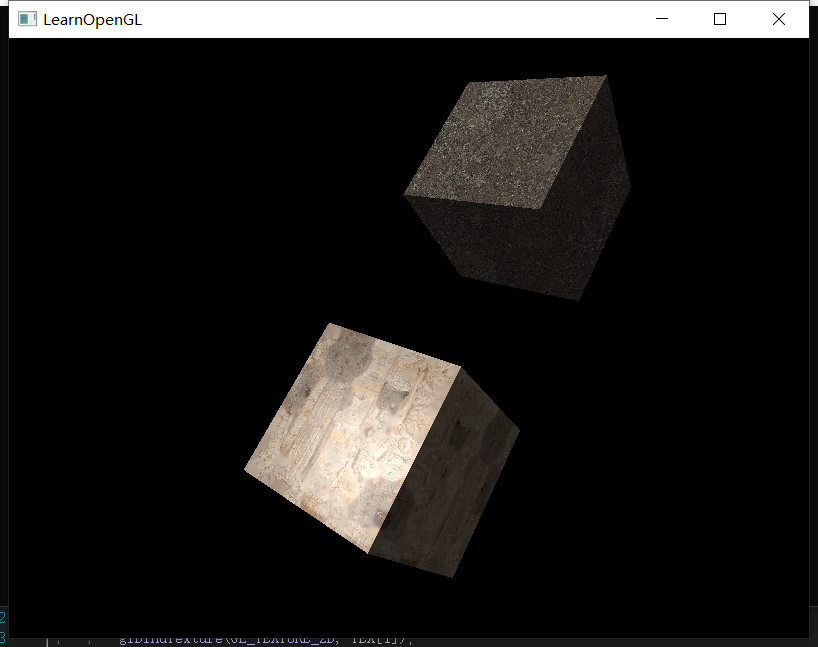
但是这里我发现了一个不太合理的现象:没有正面对着光源的那几个面都是纯灰白色,不能显示出其纹理细节。经过思考后我提出一个疑问:ambient是不是也应该在漫反射贴图上采样,而不是直接设一个纯色?(当然我也不确定这个理论是否正确,只是按照我这个理论做出来的结果看起来不错)
所以我对shader又做了一点修改,让ambient乘一个纹理颜色,此时的结果就比较合理了,背光的部分依旧能看清纹理 而不是一片灰:
按照learnOpengl的思路,接下来要对光源也定义rho_d、rho_s、ambient这些参数,我也觉得不是很合理,所以这部分先跳过了;后面一节要做高光贴图,但我也没找到比较合适的素材,所以就先不做了。
不过这里要提一下多张纹理的绑定。既然要shader同时获取到漫反射贴图和高光贴图,那么我们就需要绑定两张纹理。首先GPU中一共有16个纹理槽位(就像寄存器一样数量固定,随用随拿),我们首先调用glActiveTexture(GL_TEXTUREk)来激活k号纹理槽位,然后调用glBindTexture(GL_TEXTURE_2D, id)将编号为id的纹理绑定到对应的k号槽位中。这样gpu就成功将多张纹理载入,然后我们要调用shader.setInt(“material.xxx”, k)表示shader中的某个采样器使用的是k号槽位的贴图,这样就可以在shader中用多张贴图了。
Part5. 直接光
前面几节我们一直在讨论材质的着色,即“某个片元接收到某个方向的光照后,该输出什么颜色”。这节开始我们讨论光源的类型,即“某个片元会接收到什么方向的、什么强度的光照”。
由于光照类型多样,每种光照也有很多参数,所以我们也要将light像material一样封装起来。首先我们封装直接光:
struct DirectionLight {
    vec3 dir;
    vec3 color;
};

uniform DirectionLight dl[6];

void main()
{
    vec3 norm = normalize(normal);
    FragColor = vec4(0,0,0,1);
    //vec3 lightDir = normalize(lightPos - FragPos);

    vec3 rho_d = vec3(texture(material.rho_d_tex, texcoord));
    vec3 viewDir = normalize(cameraPos - FragPos);
    for(int i = 0; i < 6; i++){
        vec3 lightDir = normalize(-dl[i].dir);
        float cosine = max(dot(norm, lightDir), 0.0);

        vec3 reflectDir = reflect(-lightDir, norm);
        float cosine2 = pow(max(dot(viewDir, reflectDir), 0.0), material.shininess_n);
        FragColor += vec4(dl[i].color * (rho_d * cosine + material.rho_s * cosine2), 1.0);
   }
   FragColor += vec4(material.ambient * rho_d, 0);
}
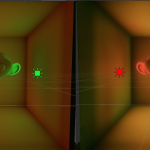
直接光只需要两个参数:方向向量、光强,不需要定义位置。这里我们一共允许传入6个直接光源,在片元着色器中,我们分别计算若干个光源的光源方向,然后代入phong模型中计算着色贡献,最后将所有灯的着色贡献全部加和在一起即可。
Part6. 带衰减的点光源
这里要新定义的点光源其实和之前那个无限点光源大同小异,不同的是这里的点光源要带衰减效应,距离光源越远的物体,接收到的光强越微弱。具体能保留多少百分比的光强由以下式子表示:
$$F_{att} = \frac{1}{K_c + K_l * d + K_q * d^2}$$
分母的三个K分别是常数项、一次项、二次项的系数,分别表示基础衰减、一次下降的速率、二次下降的速率。我们可以用constant、linear、quadratic来表示它们:
struct DirectionLight {
    vec3 dir;
    vec3 color;
};

struct PointLight{
    vec3 pos;
    vec3 color;
    float constant;
    float linear;
    float quadratic;
};

uniform DirectionLight dl[6];
uniform PointLight pl[6];

void main()
{
    vec3 norm = normalize(normal);
    FragColor = vec4(0,0,0,1);

    vec3 rho_d = vec3(texture(material.rho_d_tex, texcoord));
    vec3 viewDir = normalize(cameraPos - FragPos);
    for(int i = 0; i < 6; i++){
        if(dl[i].color == vec3(0,0,0)) continue;
        vec3 lightDir = normalize(-dl[i].dir);
        float cosine = max(dot(norm, lightDir), 0.0);
        vec3 reflectDir = reflect(-lightDir, norm);
        float cosine2 = pow(max(dot(viewDir, reflectDir), 0.0), material.shininess_n);
        FragColor += vec4(dl[i].color * (rho_d * cosine + material.rho_s * cosine2), 0.0);
    }
    for(int i = 0; i < 6; i++){
        if(pl[i].color == vec3(0,0,0)) continue;
        vec3 lightDir = normalize(pl[i].pos - FragPos);
        float distance = length(pl[i].pos - FragPos);
        float cosine = max(dot(norm, lightDir), 0.0);
        vec3 reflectDir = reflect(-lightDir, norm);
        float cosine2 = pow(max(dot(viewDir, reflectDir), 0.0), material.shininess_n);
        vec3 pl_color = pl[i].color / (pl[i].constant + pl[i].linear * distance + pl[i].quadratic * distance * distance);
        FragColor += vec4(pl_color * (rho_d * cosine + material.rho_s * cosine2), 0.0);
    }
    FragColor += vec4(material.ambient * rho_d, 0);
}
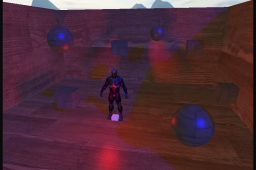
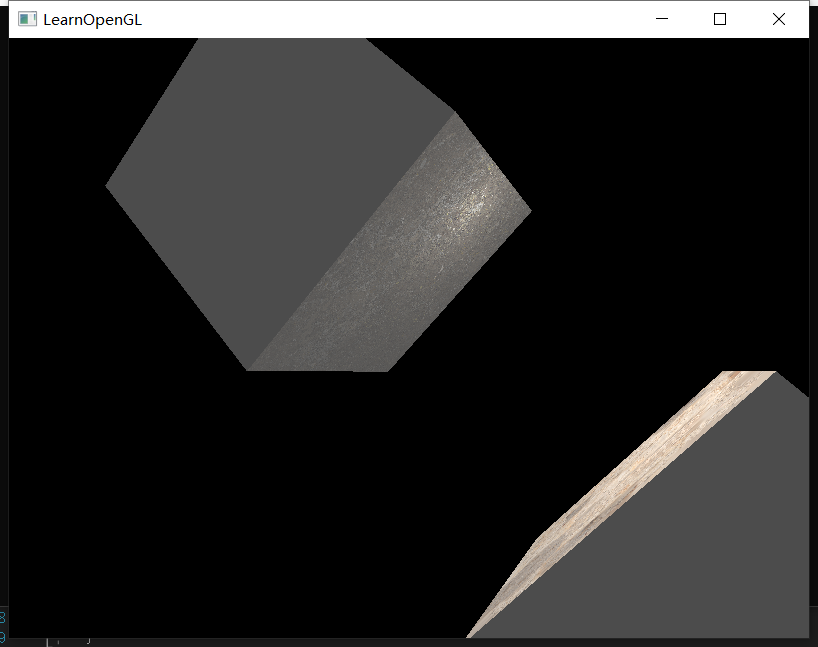
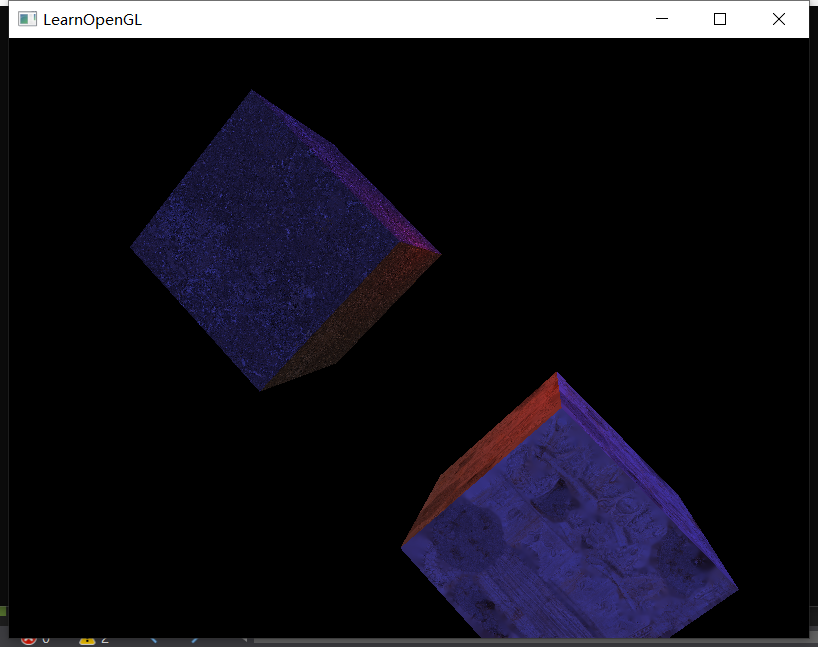
这样场景中就可以同时存在若干盏点光源和平行光了:
按照learnOpengl的顺序,接下来要做聚光灯(spot-light)了。但是我对聚光灯的印象一直不好,做场景打光也基本上不怎么用探照灯,因此这一小节直接跳过。
Part7. 模型导入
说句实话,这个opengl渲染器是我的第四个渲染器,基本上每个渲染器都要和模型导入打交道,要么是自己手搓obj_parser,要么是学习tiny_objloader,现在learnOpengl又给我推荐了个叫Assimp的屌炸天模型库,以至于我实在不想一点一点去分析模型导入的逻辑和思路了。所以这一节不会再像之前导入模型那样长篇大论分析代码。
首先简单说一下Assimp库,这是一个极强的模型parse库,可以分析多达10+种格式的模型文件,不仅可以提炼出顶点、法线、uv、顶点色等信息,甚至能解析出骨骼、蒙皮、帧动画的内容。
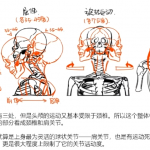
在建模软件中,我们经常会绑定父子物体,子物体还可以绑定更低一级的子物体,如此循环往复,因此Assimp分析模型的规律主要就是递归分析——整个场景是一个父节点,然后遍历第一层子物体,如果发现子物体内还有子物体,就继续遍历第二层子物体,直到遍历到的物体是纯网格物体(即没有更低级的子物体)了为止。
所以我们可以理解为,Assimp库可以通过递归,把模型文件中的所有网格物体找出来,并将每个网格物体的指针交给我们。言外之意就是,我们要对每个网格物体绑定一个单独的VAO、VBO、EBO。因此,我们第一步要做的事就是对之前定义的myMesh.h做出修改。
对于myMesh类,我发现自己犯了一个很可笑的错误,就是vector<vertice> vertice_struct是可以直接作为顶点指针传入VBO的buffer的,不需要再额外定义一个float* vertices作为中介,因为两者的空间组织是完全一样的。。。除此之外,我们把indices和texture也做成vector形式的数组。最后,我们定义一个setup函数,将mesh的所有顶点信息、索引信息、纹理信息全部绑定到位。
#pragma once
#include <glad/glad.h>
#include <glm/glm.hpp>
#include <glm/gtc/matrix_transform.hpp>
#include <glm/gtc/type_ptr.hpp>
#include <vector>
using namespace std;

struct vertice {
	glm::vec3 pos;
	glm::vec2 uv;
	glm::vec3 normal;
	glm::vec3 tangent;
	glm::vec3 bitangent;
};

class myMesh {
public:
	myMesh() {

	}
	myMesh(glm::vec3 pos_offset, glm::vec3 size, unsigned tex_id) {
		Cube(pos_offset, size, tex_id);
	}

	myMesh(vector<vertice> vertices, vector<unsigned int> indices, vector<unsigned int> textures)
	{
		this->vertice_struct = vertices;
		this->indice_struct = indices;
		this->texture_struct = textures;
	}

	void setup() {
		glGenVertexArrays(1, &VAO);
		glGenBuffers(1, &VBO);
		glGenBuffers(1, &EBO);

		glBindVertexArray(VAO);
		glBindBuffer(GL_ARRAY_BUFFER, VBO);

		glBufferData(GL_ARRAY_BUFFER, vertice_struct.size() * sizeof(vertice), &vertice_struct[0], GL_STATIC_DRAW);

		glBindBuffer(GL_ELEMENT_ARRAY_BUFFER, EBO);
		glBufferData(GL_ELEMENT_ARRAY_BUFFER, indice_struct.size() * sizeof(unsigned int), &indice_struct[0], GL_STATIC_DRAW);

		// 顶点位置
		glEnableVertexAttribArray(0);
		glVertexAttribPointer(0, 3, GL_FLOAT, GL_FALSE, sizeof(vertice), (void*)0);
		// 顶点纹理坐标
		glEnableVertexAttribArray(2);
		glVertexAttribPointer(1, 2, GL_FLOAT, GL_FALSE, sizeof(vertice), (void*)offsetof(vertice, uv));
		// 顶点法线
		glEnableVertexAttribArray(1);
		glVertexAttribPointer(2, 3, GL_FLOAT, GL_FALSE, sizeof(vertice), (void*)offsetof(vertice, normal));

		glBindVertexArray(0);
	}

	void Cube(glm::vec3 pos_offset, glm::vec3 size, unsigned int tex_id) {
		vertice_struct.push_back(vertice{ glm::vec3(-0.5f,  0.5f, -0.5f),glm::vec2(0.0f, 1.0f),glm::vec3(0.0f,1.0f,0.0f) });
......

		for (int i = 0; i < vertice_struct.size(); i++) {
			vertice_struct[i].pos = vertice_struct[i].pos * size + pos_offset;
		}
		for (unsigned int i = 0; i < indice_struct.size(); i++)
			indice_struct.push_back(i);
		texture_struct.push_back(tex_id);
	}

private:
	vector<vertice> vertice_struct;
	vector<unsigned int> indice_struct;
	vector<unsigned int> texture_struct;

	unsigned int VAO, VBO, EBO;

};
现在VAO、VAO、EBO都可以绑定好了,唯一剩下的问题是:怎么定义该myMesh的渲染函数?
其实渲染函数最麻烦的地方就是处理贴图。在即将渲染的时候,我们必须将所有贴图全部都绑定到shader中去。然而shader中需要区分:哪些是漫反射纹理,哪些是高光纹理,哪些是法线贴图等等。所以我们的纹理类型不能只有一个unsigned int,还需要有个string来标识它的类型:
struct myTexture {
    unsigned int id;
    string type;
    string path;
};
有了myTexture来描述纹理id、类型和路径后,我们定义一下Draw函数:
void Draw(myShader shader) {
		shader.setBool("material.diffuse_texture_use", false);
		shader.setBool("material.specular_texture_use", false);
		for (unsigned int i = 0; i < texture_struct.size(); i++)
		{
			glActiveTexture(GL_TEXTURE0 + i);
			string name = texture_struct[i].type;
			shader.setInt(("material." + name).c_str(), i);
			shader.setBool(("material." + name + "_use").c_str(), true);
			glBindTexture(GL_TEXTURE_2D, texture_struct[i].id);
		}
		glActiveTexture(GL_TEXTURE0);

		glBindVertexArray(VAO);
		glDrawElements(GL_TRIANGLES, indice_struct.size(), GL_UNSIGNED_INT, 0);
		glBindVertexArray(0);
	}
我们用xxx_texture_use表示是否存在xxx贴图,用xxx_texture表示xxx贴图。这里我其实约定了一件事:一个材质只能拥有一个贴图,暂时不考虑多张贴图混合的情况。至于片元着色器也需要将上述的参数进行修改,将漫反射分量分为diffuse和diffuse_texture两部分,如果diffuse_texture_use是true,则漫反射量从贴图上进行采样;如果是false,则直接取diffuse的值作为漫反射量:
struct Material {
    vec3 ambient;

    vec3 diffuse;
    bool diffuse_texture_use;
    sampler2D diffuse_texture;
    vec3 specular;
    bool specular_texture_use;
    sampler2D specular_texture;

    float shininess_n;
};
uniform Material material;
...
void main()
{
    vec3 norm = normalize(normal);
    FragColor = vec4(0,0,0,1);

    vec3 rho_d;
    if(material.diffuse_texture_use == true) rho_d = vec3(texture(material.diffuse_texture, texcoord));
    else rho_d = material.diffuse;

    vec3 rho_s;
    if(material.specular_texture_use == true) rho_s = vec3(texture(material.specular_texture, texcoord));
    else rho_s = material.specular;

    vec3 viewDir = normalize(cameraPos - FragPos);
    ...
}
好了,这样我们就将网格的构造、绑定、渲染全部封装好了,并且为shader提供了相应的接口。
那么下一件事,就是请Assimp出马了。这部分代码实在是懒得分析了,就直接粘贴learnOpengl的代码了:
Code Viewer. Source code: src/3.model_loading/1.model_loading/model_loading.cpp (learnopengl.com)
代码如下:
#pragma once

#include <glad/glad.h>

#include <glm/glm.hpp>
#include <glm/gtc/matrix_transform.hpp>
#include <assimp/Importer.hpp>
#include <assimp/scene.h>
#include <assimp/postprocess.h>

#include "myMesh.h"
#include "myShader.h"
#include "myTexture.h"

#include <string>
#include <fstream>
#include <sstream>
#include <iostream>
#include <map>
#include <vector>
using namespace std;

unsigned int TextureFromFile(const char* path, const string& directory, bool gamma = false);

class myModel
{
public:
    // model data
    vector<myTexture> textures_loaded;	// stores all the textures loaded so far, optimization to make sure textures aren't loaded more than once.
    vector<myMesh>    meshes;
    string directory;
    bool gammaCorrection;

    // constructor, expects a filepath to a 3D model.
    myModel(string const& path, bool gamma = false) : gammaCorrection(gamma)
    {
        loadModel(path);
        Setup();
    }

    void Setup() {
        for (unsigned int i = 0; i < meshes.size(); i++)
            meshes[i].Setup();
    }
    // draws the model, and thus all its meshes
    void Draw(myShader& shader)
    {
        for (unsigned int i = 0; i < meshes.size(); i++)
            meshes[i].Draw(shader);
    }

private:
    // loads a model with supported ASSIMP extensions from file and stores the resulting meshes in the meshes vector.
    void loadModel(string const& path)
    {
        // read file via ASSIMP
        Assimp::Importer importer;
        const aiScene* scene = importer.ReadFile(path, aiProcess_Triangulate | aiProcess_GenSmoothNormals | aiProcess_FlipUVs | aiProcess_CalcTangentSpace);
        // check for errors
        if (!scene || scene->mFlags & AI_SCENE_FLAGS_INCOMPLETE || !scene->mRootNode) // if is Not Zero
        {
            cout << "ERROR::ASSIMP:: " << importer.GetErrorString() << endl;
            return;
        }
        // retrieve the directory path of the filepath
        directory = path.substr(0, path.find_last_of('/'));

        // process ASSIMP's root node recursively
        processNode(scene->mRootNode, scene);
    }

    // processes a node in a recursive fashion. Processes each individual mesh located at the node and repeats this process on its children nodes (if any).
    void processNode(aiNode* node, const aiScene* scene)
    {
        // process each mesh located at the current node
        for (unsigned int i = 0; i < node->mNumMeshes; i++)
        {
            // the node object only contains indices to index the actual objects in the scene.
            // the scene contains all the data, node is just to keep stuff organized (like relations between nodes).
            aiMesh* mesh = scene->mMeshes[node->mMeshes[i]];
            meshes.push_back(processMesh(mesh, scene));
        }
        // after we've processed all of the meshes (if any) we then recursively process each of the children nodes
        for (unsigned int i = 0; i < node->mNumChildren; i++)
        {
            processNode(node->mChildren[i], scene);
        }

    }

    myMesh processMesh(aiMesh* mesh, const aiScene* scene)
    {
        // data to fill
        vector<vertice> vertices;
        vector<unsigned int> indices;
        vector<myTexture> textures;

        // walk through each of the mesh's vertices
        for (unsigned int i = 0; i < mesh->mNumVertices; i++)
        {
            vertice vertex;
            glm::vec3 vector; // we declare a placeholder vector since assimp uses its own vector class that doesn't directly convert to glm's vec3 class so we transfer the data to this placeholder glm::vec3 first.
            // positions
            vector.x = mesh->mVertices[i].x;
            vector.y = mesh->mVertices[i].y;
            vector.z = mesh->mVertices[i].z;
            vertex.pos = vector;
            // normals
            if (mesh->HasNormals())
            {
                vector.x = mesh->mNormals[i].x;
                vector.y = mesh->mNormals[i].y;
                vector.z = mesh->mNormals[i].z;
                vertex.normal = vector;
            }
            // texture coordinates
            if (mesh->mTextureCoords[0]) // does the mesh contain texture coordinates?
            {
                glm::vec2 vec;
                // a vertex can contain up to 8 different texture coordinates. We thus make the assumption that we won't
                // use models where a vertex can have multiple texture coordinates so we always take the first set (0).
                vec.x = mesh->mTextureCoords[0][i].x;
                vec.y = mesh->mTextureCoords[0][i].y;
                vertex.uv = vec;
                // tangent
                vector.x = mesh->mTangents[i].x;
                vector.y = mesh->mTangents[i].y;
                vector.z = mesh->mTangents[i].z;
                vertex.tangent = vector;
                // bitangent
                vector.x = mesh->mBitangents[i].x;
                vector.y = mesh->mBitangents[i].y;
                vector.z = mesh->mBitangents[i].z;
                vertex.bitangent = vector;
            }
            else
                vertex.uv = glm::vec2(0.0f, 0.0f);

            vertices.push_back(vertex);
        }
        // now wak through each of the mesh's faces (a face is a mesh its triangle) and retrieve the corresponding vertex indices.
        for (unsigned int i = 0; i < mesh->mNumFaces; i++)
        {
            aiFace face = mesh->mFaces[i];
            // retrieve all indices of the face and store them in the indices vector
            for (unsigned int j = 0; j < face.mNumIndices; j++)
                indices.push_back(face.mIndices[j]);
        }
        // process materials
        aiMaterial* material = scene->mMaterials[mesh->mMaterialIndex];
        // we assume a convention for sampler names in the shaders. Each diffuse texture should be named
        // as 'texture_diffuseN' where N is a sequential number ranging from 1 to MAX_SAMPLER_NUMBER.
        // Same applies to other texture as the following list summarizes:
        // diffuse: texture_diffuseN
        // specular: texture_specularN
        // normal: texture_normalN

        // 1. diffuse maps
        vector<myTexture> diffuseMaps = loadMaterialTextures(material, aiTextureType_DIFFUSE, "diffuse_texture");
        textures.insert(textures.end(), diffuseMaps.begin(), diffuseMaps.end());
        // 2. specular maps
        vector<myTexture> specularMaps = loadMaterialTextures(material, aiTextureType_SPECULAR, "specular_texture");
        textures.insert(textures.end(), specularMaps.begin(), specularMaps.end());
        // 3. normal maps
        std::vector<myTexture> normalMaps = loadMaterialTextures(material, aiTextureType_HEIGHT, "normal_texture");
        textures.insert(textures.end(), normalMaps.begin(), normalMaps.end());
        // 4. height maps
        std::vector<myTexture> heightMaps = loadMaterialTextures(material, aiTextureType_AMBIENT, "height_texture");
        textures.insert(textures.end(), heightMaps.begin(), heightMaps.end());

        // return a mesh object created from the extracted mesh data
        return myMesh(vertices, indices, textures);
    }

    // checks all material textures of a given type and loads the textures if they're not loaded yet.
    // the required info is returned as a Texture struct.
    vector<myTexture> loadMaterialTextures(aiMaterial* mat, aiTextureType type, string typeName)
    {
        vector<myTexture> textures;
        for (unsigned int i = 0; i < mat->GetTextureCount(type); i++)
        {
            aiString str;
            mat->GetTexture(type, i, &str);
            // check if texture was loaded before and if so, continue to next iteration: skip loading a new texture
            bool skip = false;
            for (unsigned int j = 0; j < textures_loaded.size(); j++)
            {
                if (std::strcmp(textures_loaded[j].path.data(), str.C_Str()) == 0)
                {
                    textures.push_back(textures_loaded[j]);
                    skip = true; // a texture with the same filepath has already been loaded, continue to next one. (optimization)
                    break;
                }
            }
            if (!skip)
            {   // if texture hasn't been loaded already, load it
                myTexture texture;
                texture.id = TextureFromFile(str.C_Str(), this->directory);
                texture.type = typeName;
                texture.path = str.C_Str();
                textures.push_back(texture);
                textures_loaded.push_back(texture);  // store it as texture loaded for entire model, to ensure we won't unnecessary load duplicate textures.
            }
        }
        return textures;
    }
};


unsigned int TextureFromFile(const char* path, const string& directory, bool gamma)
{
    string filename = string(path);
    filename = directory + '/' + filename;

    unsigned int textureID;
    glGenTextures(1, &textureID);

    int width, height, nrComponents;
    unsigned char* data = stbi_load(filename.c_str(), &width, &height, &nrComponents, 0);
    if (data)
    {
        GLenum format;
        if (nrComponents == 1)
            format = GL_RED;
        else if (nrComponents == 3)
            format = GL_RGB;
        else if (nrComponents == 4)
            format = GL_RGBA;

        glBindTexture(GL_TEXTURE_2D, textureID);
        glTexImage2D(GL_TEXTURE_2D, 0, format, width, height, 0, format, GL_UNSIGNED_BYTE, data);
        glGenerateMipmap(GL_TEXTURE_2D);

        glTexParameteri(GL_TEXTURE_2D, GL_TEXTURE_WRAP_S, GL_REPEAT);
        glTexParameteri(GL_TEXTURE_2D, GL_TEXTURE_WRAP_T, GL_REPEAT);
        glTexParameteri(GL_TEXTURE_2D, GL_TEXTURE_MIN_FILTER, GL_LINEAR_MIPMAP_LINEAR);
        glTexParameteri(GL_TEXTURE_2D, GL_TEXTURE_MAG_FILTER, GL_LINEAR);

        stbi_image_free(data);
    }
    else
    {
        std::cout << "Texture failed to load at path: " << path << std::endl;
        stbi_image_free(data);
    }

    return textureID;
}
然后在main函数中setup、draw即可。这部分是很繁杂的细节调整内容,就不多赘述了。
实话说,我怀疑里面存在一个严重的问题:一个mesh只对应一个材质编号。在建模软件里一个物体对应多个材质是很常见的事情,然而调用了assimp的库方法后,一个mesh和一个材质一一对应,这可能是一个相当大的隐患。具体会不会翻车目前尚不可知,不过日后要警惕这件事。
You may also Like

Opengl实时渲染器(六)延迟渲染与SSAO

Opengl实时渲染器(五)PBR与IBL